Steps to Add Discounts on Invoices in Odoo 18
Managing invoices is a big part of running any business. Sometimes, you want to reward loyal customers with a discount, run a special promotion, or adjust pricing for bulk orders. With Odoo 18 Accounting, applying discounts on invoices is easier than ever — you just need to know how to set it up correctly.
In this blog, we’ll walk you through step-by-step on how to add discounts on invoices in Odoo 18.
Why Discounts Matter in Invoicing?
Before we jump into the steps, let’s quickly understand why discounts are important:
Attractive discounts encourage customers to buy more.
Helps you build long-term relationships.
Great way to move stock faster.
Makes your business look more professional and customer-friendly.
Now, let’s see how to configure and apply discounts in Odoo 18 invoices.
Step 1: Enable Discounts in Odoo 18
By default, Odoo doesn’t show a discount field in invoices. You need to activate it:
- Go to Sales > Configuration > Settings.
- Scroll down to the Pricing section.
- Enable the option Discounts (this allows you to add a discount column in invoices and sales orders).
- Click Save.
Now the Discount (%) field will appear in your invoice lines.
Step 2: Create a Customer Invoice
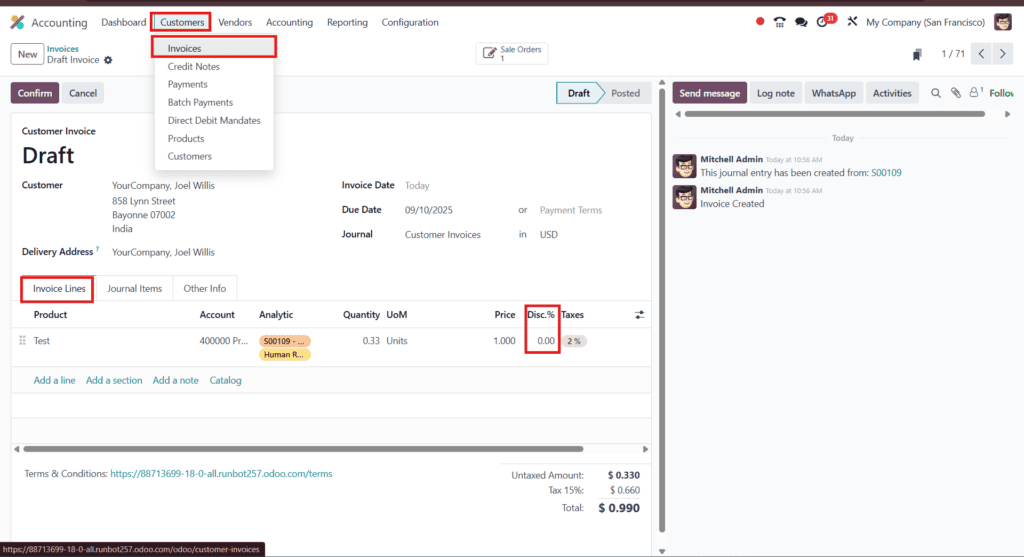
- Navigate to Accounting > Customers > Invoices.
- Click Create to generate a new invoice.
- Select the Customer.
- Add your products or services to the invoice lines.
Step 3: Apply Discount on Invoice Lines
- In each invoice line, you’ll see a Discount (%) column.
- Enter the percentage you want to apply (e.g., 10 for 10% off).
- Odoo will automatically adjust the price and totals.
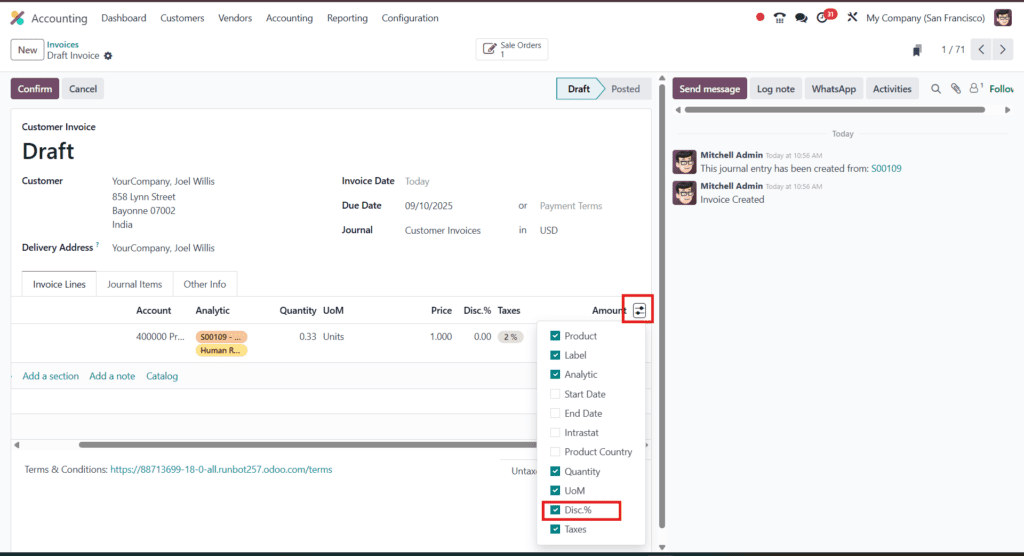
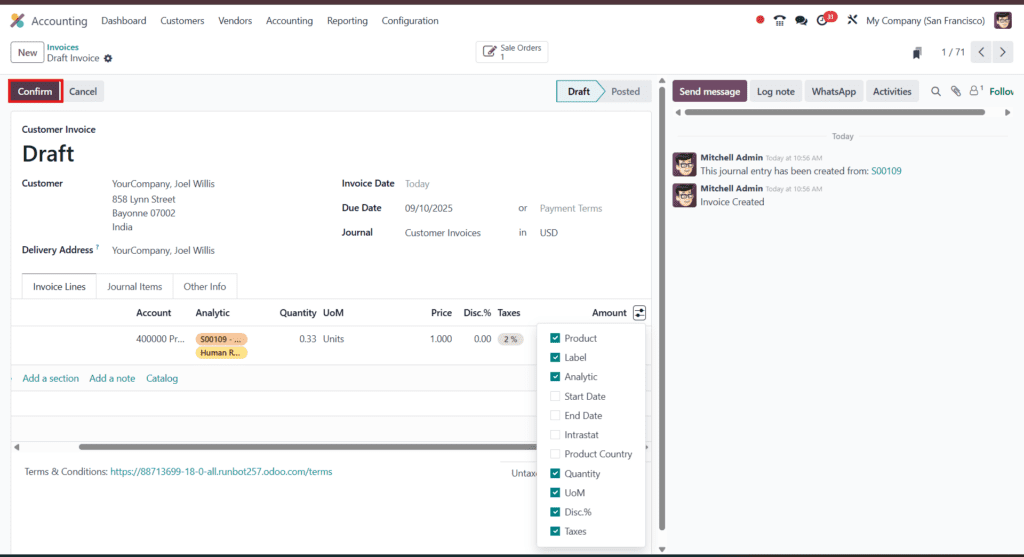
Note:
Sometimes you will not see that Discount option so to enable it scroll to right and click on the option as mentioned in the given image and enable it.
If you prefer a fixed discount amount instead of a percentage, add a new line item called “Discount” and enter the negative value.
Step 4: Validate & Send Invoice
- Double-check the invoice totals and discount calculations.
- Click Confirm to validate.
- Send the invoice by email or download the PDF.
Step 5: Monitor Discounts in Reports

To see how discounts impact your business:
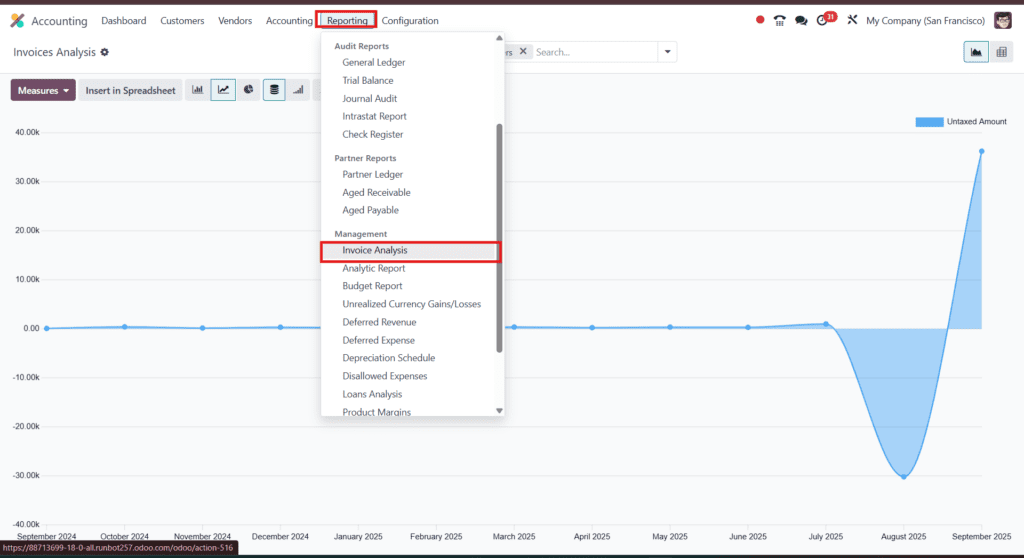
- Go to Accounting > Reporting > Invoices Analytics.
- Apply filters to track discounts over a specific period.
- Use these insights to improve your pricing and promotion strategy.
Note: UI Changes in Odoo 18
Unlike older versions (Odoo 14–16), discounts are no longer enabled from Accounting settings. In Odoo 18, you must activate them under Sales > Settings.
Final Thoughts
Adding discounts on invoices in Odoo 18 is a simple yet powerful way to improve customer satisfaction and drive more sales. Just enable the discount option, apply it to invoice lines, and let Odoo handle the rest automatically.