Step by Step Guide to create, validate, and pay vendor bills in Odoo
Managing vendor bills can be confusing if you’re doing it manually or using outdated systems. But with Odoo ERP, the entire process becomes smooth and error-free. If you’re a business owner or accountant looking to record and manage vendor bills easily, this blog is for you!
In this guide, we’ll show you how to create, validate, and pay vendor bills in Odoo using simple steps. No technical knowledge is needed — just follow along!
What is a Vendor Bill in Odoo?
A Vendor Bill in Odoo is an invoice that your vendor (supplier) sends you for the products or services they’ve delivered. Recording this bill properly is important for tracking your business expenses, managing payments, and keeping accurate financial reports.
To record and manage vendor bills in Odoo, go to the Accounting module, click on “Vendor Bills,” and create a new bill by entering the vendor details, products, and amounts. Validate the bill to finalize it.
Step 1: Open the Invoicing Module
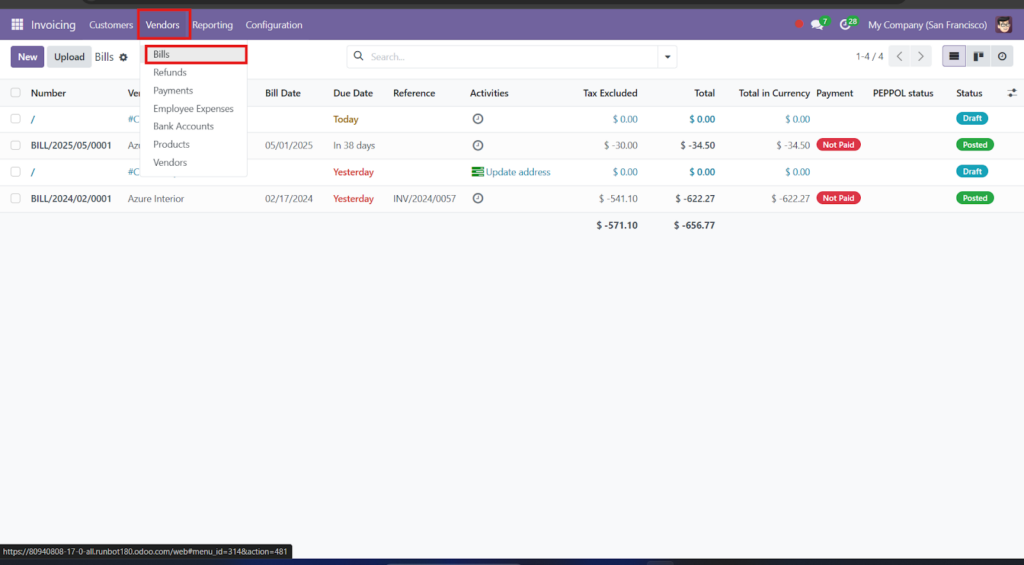
- First, log in to your Odoo account.
- On the dashboard, click on the “Invoicing/Accounting” module.
- In the left menu, go to Vendors > Bills.
Here, you will see the list of all previously recorded bills.
Step 2: Create a New Vendor Bill
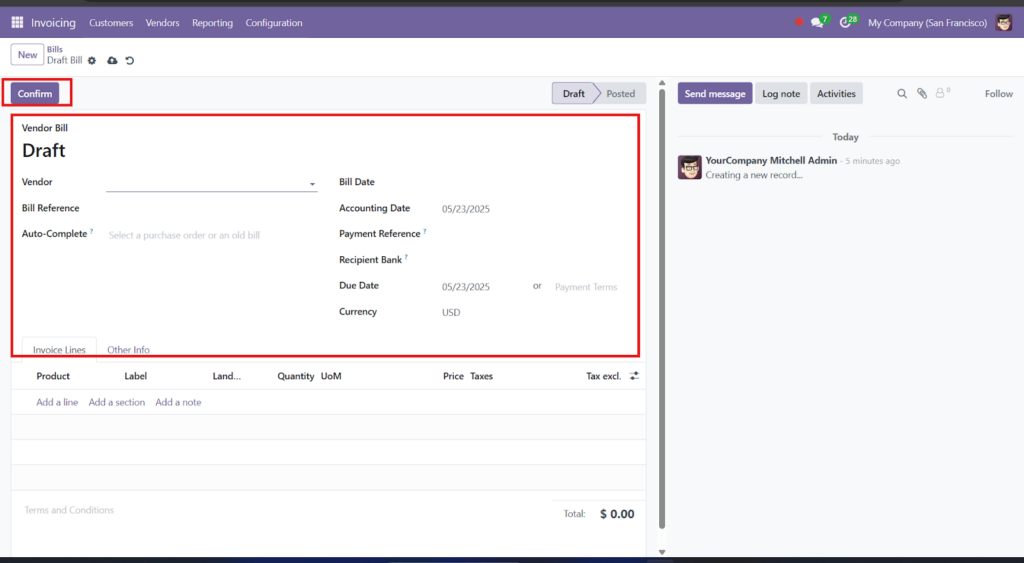
- Click on the “Create” button (top left corner).
- You will now see a new bill form.
- Fill in the following details:
- Vendor: Select the name of the vendor from the dropdown.
- Bill Date: Enter the date mentioned on the vendor invoice.
- Due Date: Enter the date by which payment should be made.
- Vendor Reference: Add the invoice number from the vendor (helps in tracking).
- Vendor: Select the name of the vendor from the dropdown.
Note: Always use the correct vendor and reference number to avoid duplicates.
Step 3: Add Products or Services
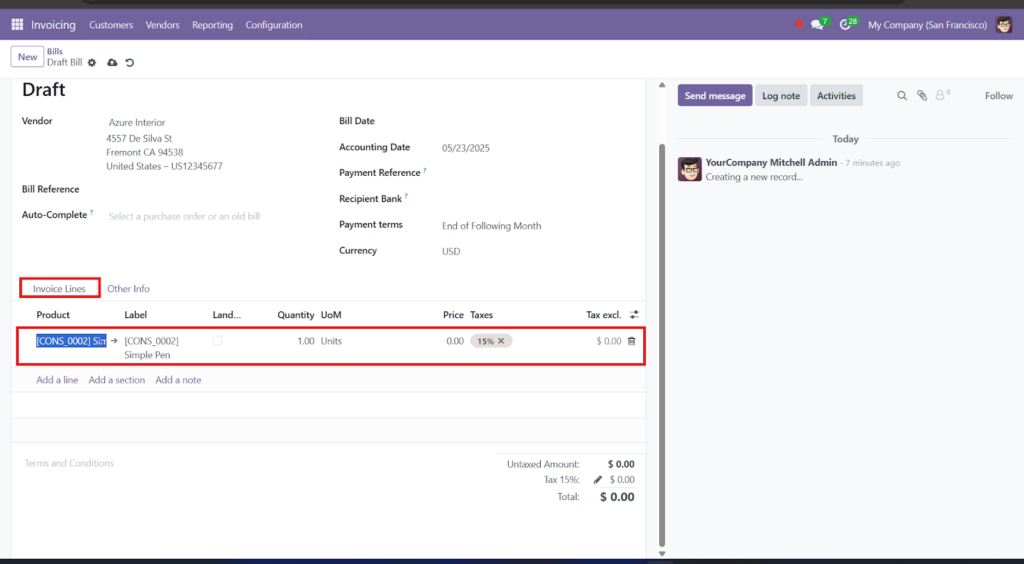
Scroll down to the “Invoice Lines” section and:
- Click on “Add a line”.
- Select the product/service your vendor has invoiced you for.
- Odoo will automatically fill in:
- Quantity
- Price
- Taxes (if set in product settings)
- Expense Account
- Quantity
Pro Tip: Make sure your products and services are already created in the system with the correct pricing and tax settings to save time.
Step 4: Validate the Bill
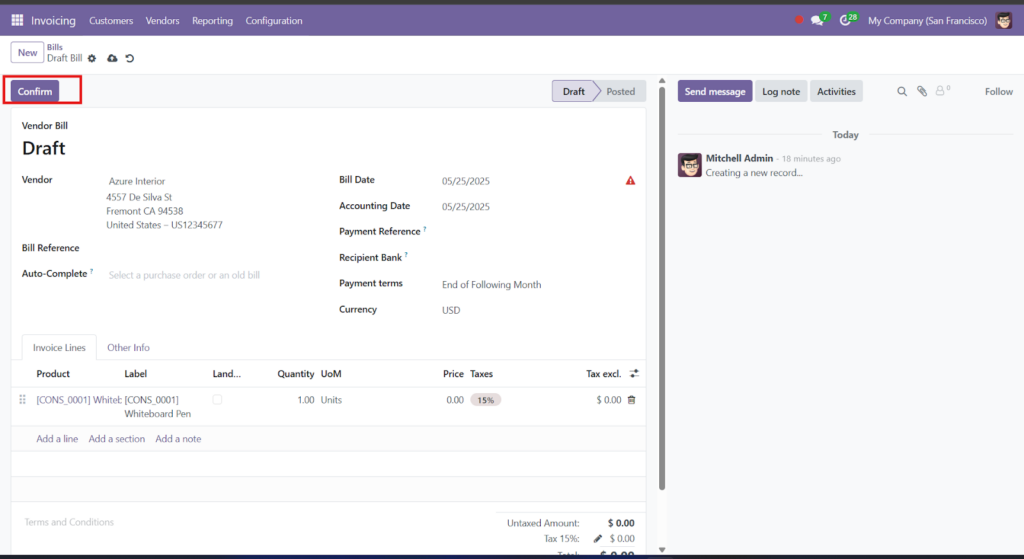
Once all the details are filled:
- Double-check the information.
- Click on the “Validate” button (top left).
This confirms the bill and posts it to your accounting books. After validation, you can’t edit the bill unless you cancel it.
Step 5: Register a Payment
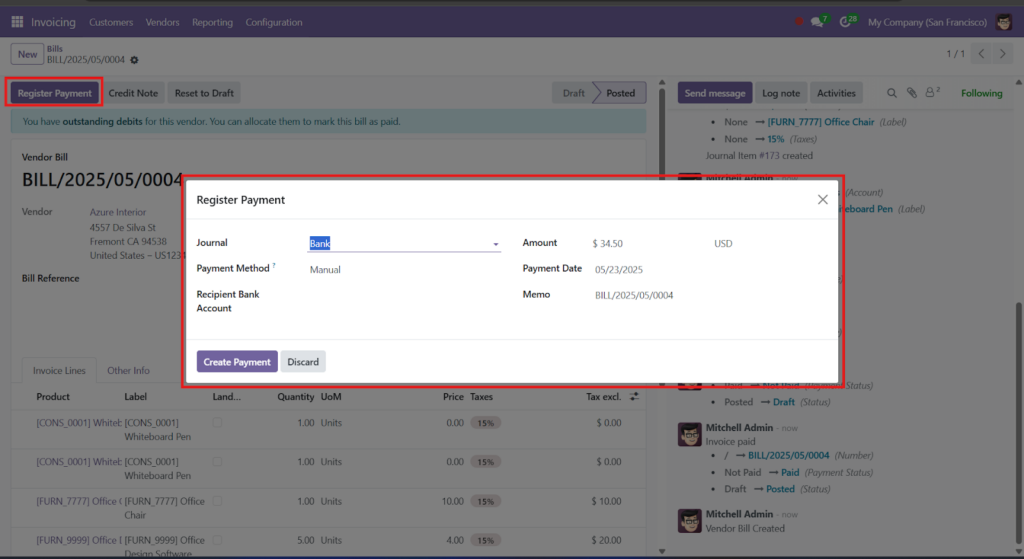
If you’re ready to pay the vendor:
- Click on “Register Payment”.
- A pop-up will appear — fill the details:
- Amount to be paid
- Payment Date
- Payment Journal (e.g., Bank, Cash)
- Amount to be paid
- Click “Validate”.
Odoo will now:

- Mark the bill as Paid
- Automatically create the accounting entry
- Reconcile the payment with the bill
Step 6: Track and Manage All Vendor Bills
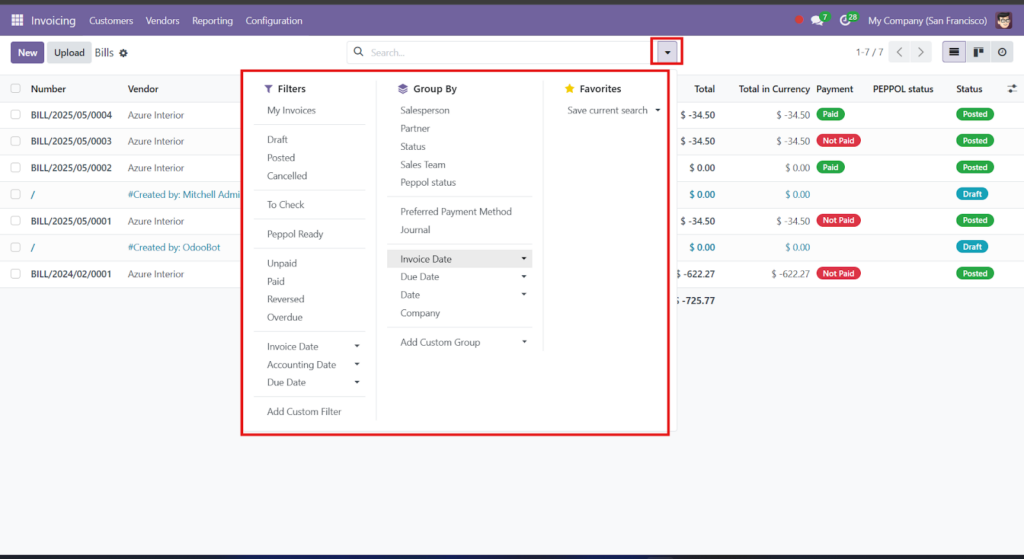
Odoo makes it super easy to search, filter, and track bills. On the Bills page, you can:
- Filter by status (Draft, Posted, Paid)
- Search by vendor name
- Sort by due dates
- Export bills for offline records
Bonus: You can also schedule payment reminders or automate payment emails using Odoo.
Common Mistakes to Avoid
- Not entering vendor reference – makes tracking hard
- Wrong tax or expense account – leads to inaccurate reports
- Forgetting to validate – bill won’t be recorded in accounting
- Manual payments without registering – causes mismatch in books
Avoid these to keep your financials clean and compliant.
Why Use Odoo to Manage Vendor Bills?
- Automation: Odoo automates calculations and tax handling.
- Document Management: Easily attach and store invoices.
- Integration: Seamlessly integrates with Inventory and Purchase modules.
- Accuracy: Reduces errors in data entry and payments.
Manage Vendor Bills in Odoo with Ease
Odoo’s user-friendly interface makes bill management hassle-free. Whether it’s recording, validating, or tracking payments, Odoo ensures your finances are accurate and well-organized.
Need Help with Odoo Implementation?

Need Help with Odoo Implementation?
If you’re new to Odoo or need help setting it up for your business, our team at Odiware is here to support you.
- Phone: +91 86608 65440
- Email: sales@odiware.com
- Website: www.odiware.com
Simplify your vendor bill management with Odoo and take your business to the next level!


